> ## Documentation Index
> Fetch the complete documentation index at: https://docsy3.mile.app/llms.txt
> Use this file to discover all available pages before exploring further.
# Geotagging
This configuration allows you to automatically assign visit tags based on geographic areas.
## How to Create a Geotag
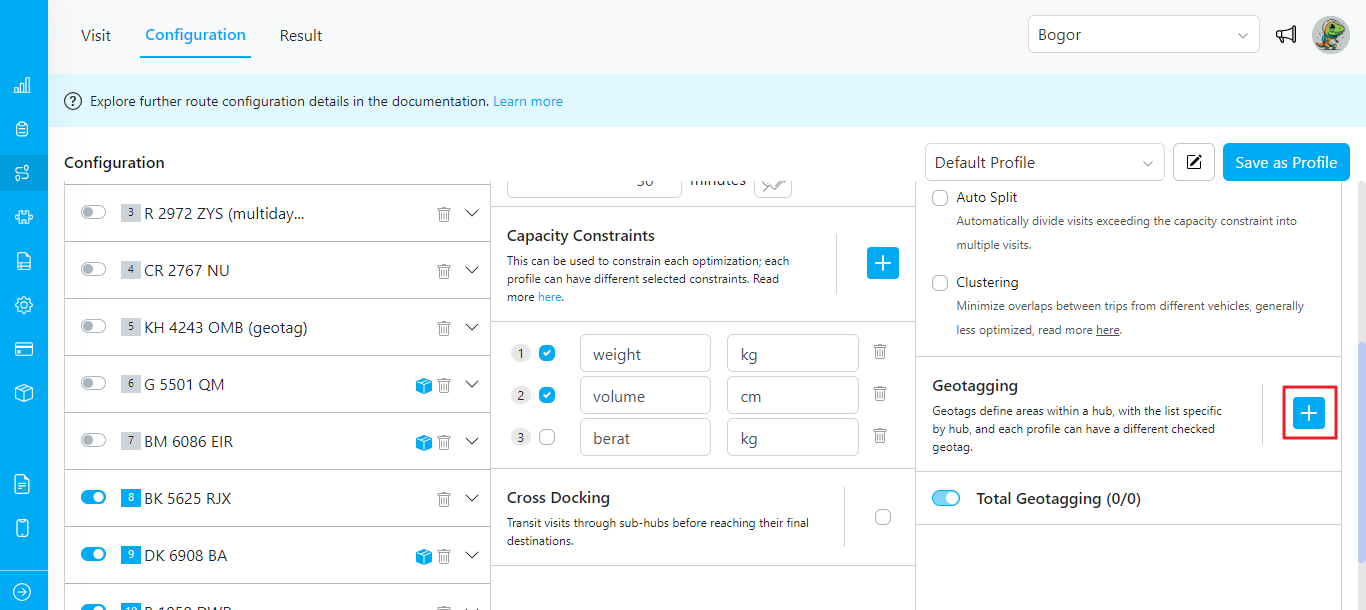
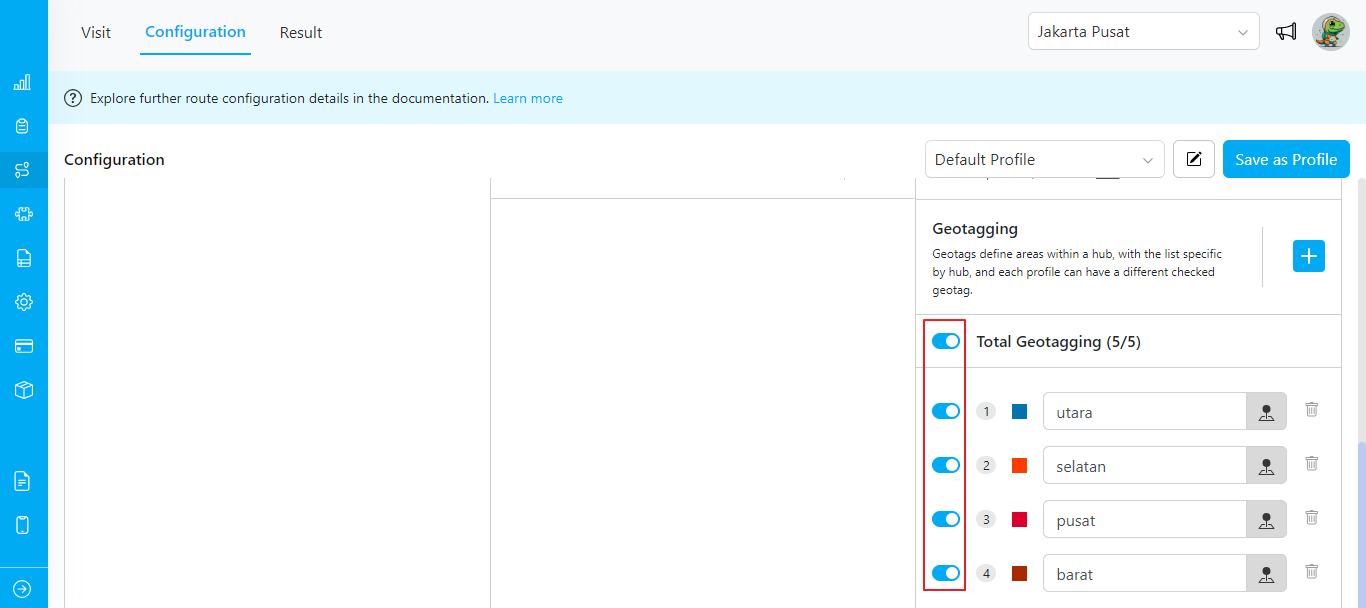
1. **Navigate to the Routing/Configuration menu and scroll down to the Geotagging section.**
2. **Click on the + icon** to start creating a new tag.
3. **Enter the tag name**, for example, "Selatan". This name usually corresponds to a specific area. Note: The geotag name must be **unique** and cannot be duplicated.
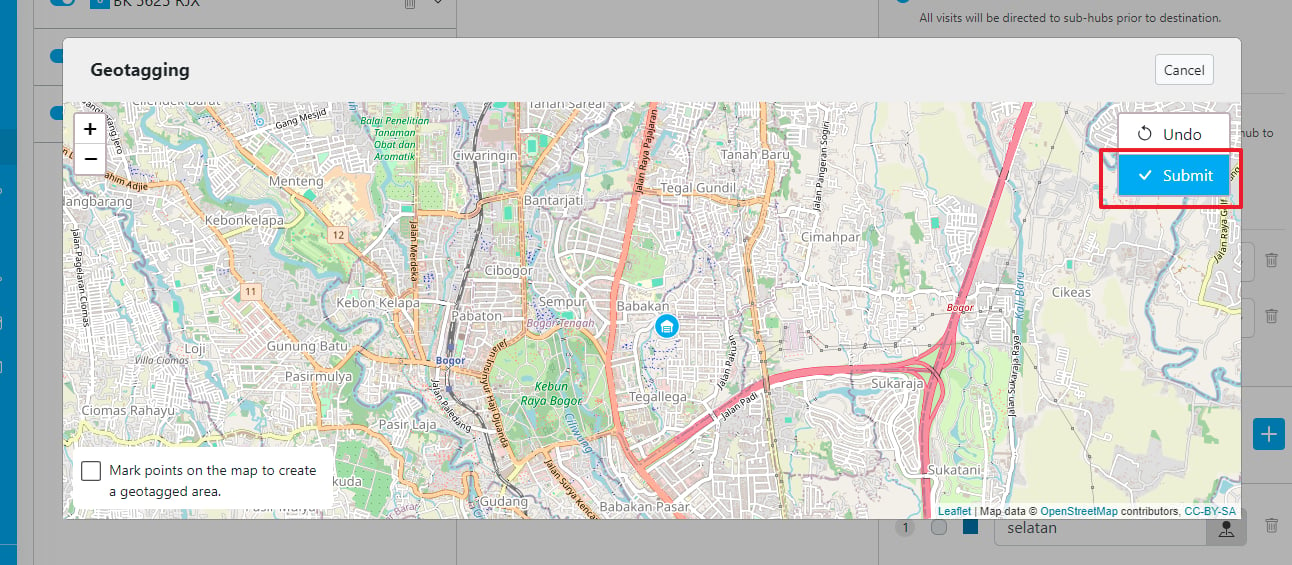
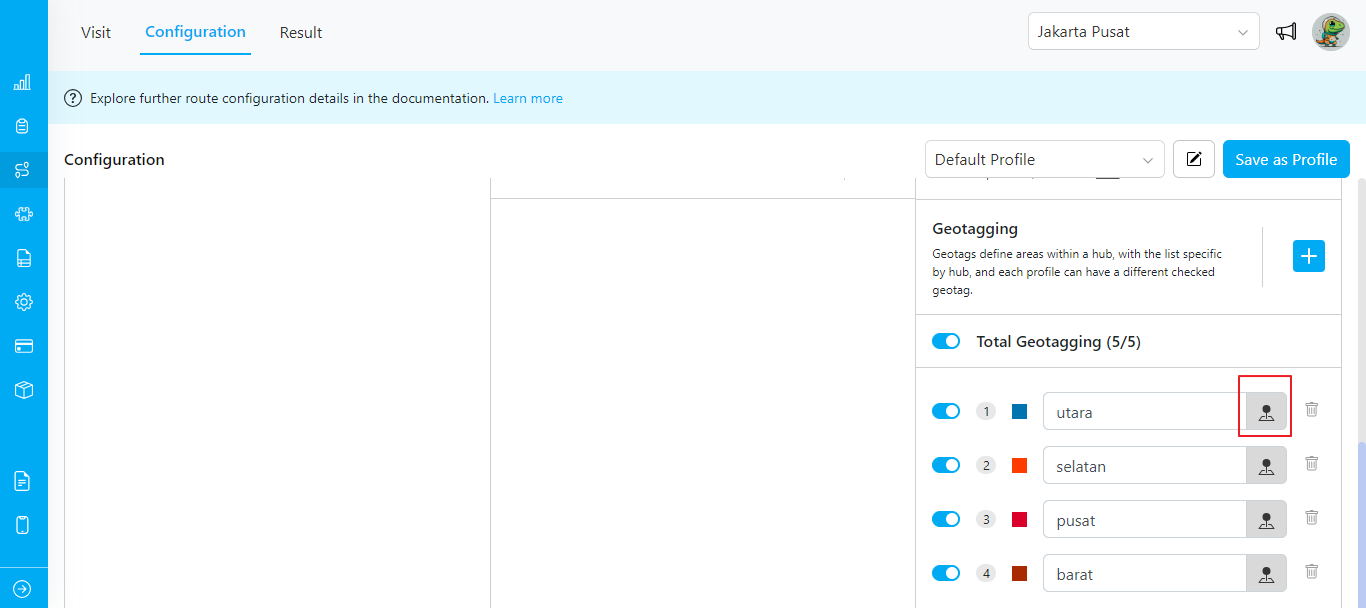
4. **Click on the map icon** to start creating a polygon by dropping points on the map to outline the area.
5. **Click Submit** when you have finished defining the area.
* The list of geotags is specific to each **hub**. Whenever you change the filter hub in the top right corner, the geotag list will update accordingly.
* If a visit already has a manually input tag, the geotag will be added to the existing visit tag.
* When polygons overlap, a visit within the overlapping area will be tagged with all relevant geotags.
## Example
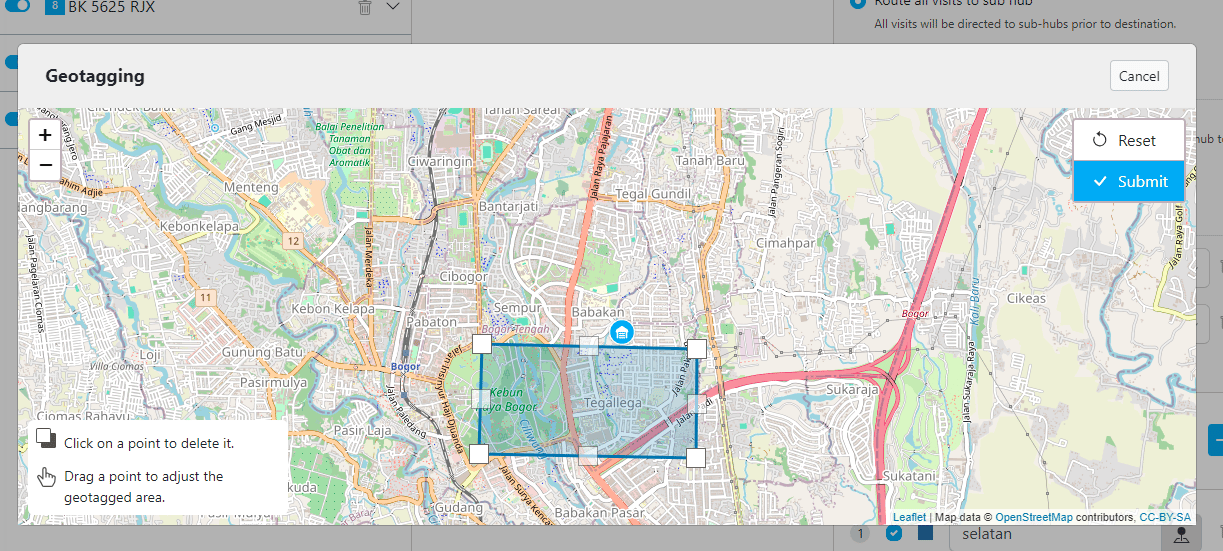
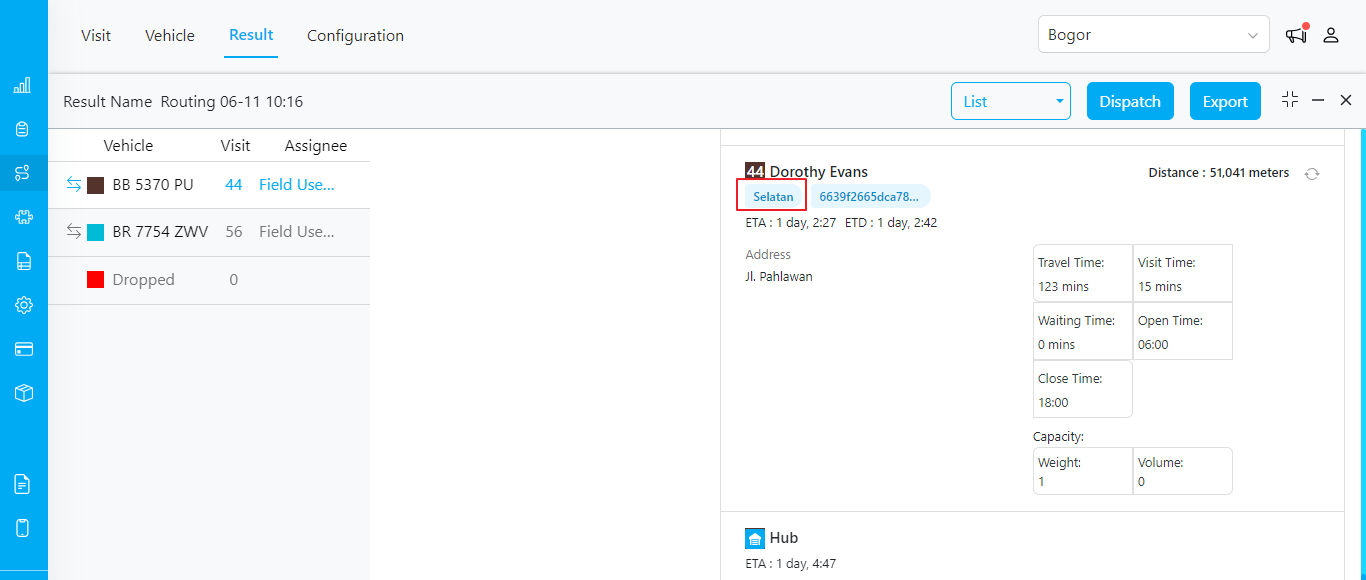
Once geotagging is set up, any visit within the defined area will automatically receive the corresponding tag. For instance, if you create a geotag named "Selatan" for the area below:
Any visit occurring at coordinates within this area will automatically be tagged as "Selatan" when you optimize routing.
**Notes**: Before optimizing, you can select specific geotags to include in the route optimization.
## How to Edit Geotag
If you need to modify the area of a saved geotag, follow these steps:
1. Click on the map icon associated with the specific geotag you wish to edit.
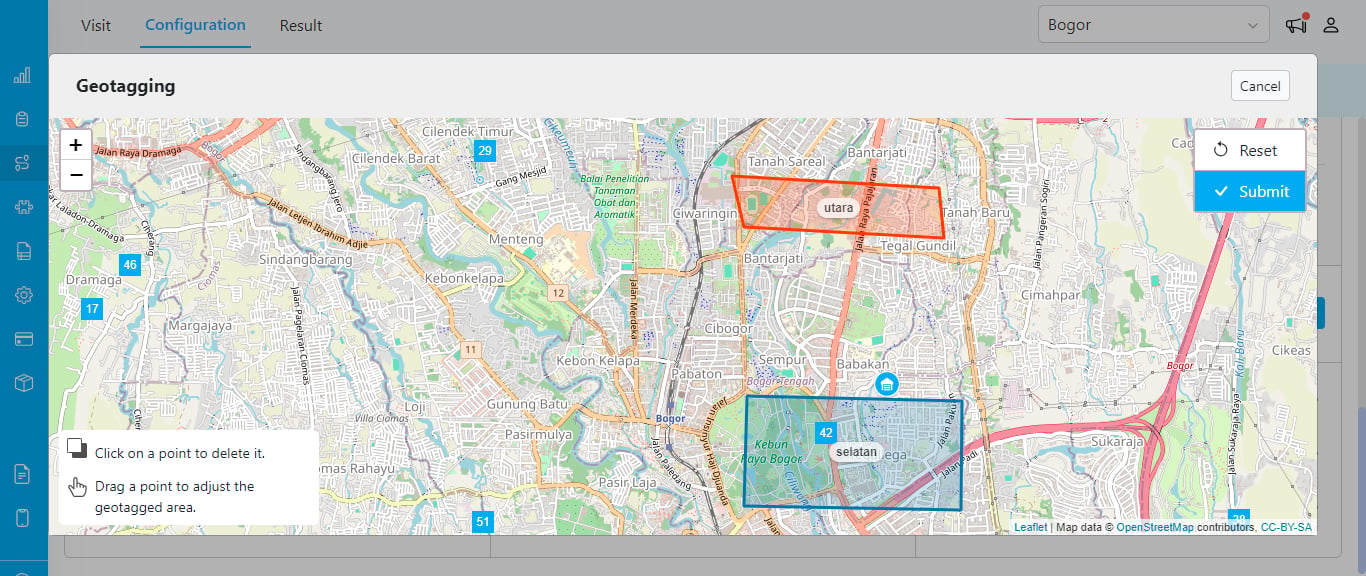
2. A map will appear, displaying the current geotagged area. You can adjust this area in two ways:
* **Delete a Point:** Click on a point to remove it from the geotagged area.
* **Adjust a Point:** Drag a point to a new location to reshape the geotagged area.
By using these methods, you can easily update the geotag to accurately reflect the desired area.
When you have more than one geotag and you click to edit an area, other geotags will be visible and identifiable by their names:
## Geotagging vs. Clustering
Geotagging and [Clustering](/pages/route-optimization/configuration/clustering) both deal with dividing work across geographic areas, but they solve different problems and are controlled differently.
**Geotagging is manual and planner-controlled.** You draw the zone boundaries yourself as fixed polygons on the map. Every visit that falls inside a zone automatically receives that zone's **tag**, and when you give the same tag to specific vehicles, only those vehicles are allowed to serve that area. The boundaries you draw stay the same on every optimization run, so the areas are stable and predictable — you decide exactly where each zone begins and ends, and which vehicles serve it.
**Clustering is automatic and engine-controlled.** You do not draw any areas. Instead, the routing engine groups nearby visits into clusters and assigns each cluster to a vehicle, with the goal of **minimizing overlap** between different vehicles' routes. The engine derives the territory boundaries from the actual distribution of visits, so they can change from one optimization to the next, and the engine — not you — decides which vehicle gets which area.
| Aspect | Geotagging | Clustering |
| - | - | - |
| Who defines the area | **You** — draw fixed polygons on the map | **The engine** — derives clusters from visit locations |
| Primary purpose | Assign tags by area to control *which* vehicle serves *which* area | Minimize overlap between vehicle routes |
| Vehicle assignment | Through tag matching (visit tag must match a vehicle tag) | The engine assigns each cluster to a vehicle automatically |
| Boundaries | Fixed and identical on every run | Derived per optimization; may change as visits change |
| Setup | Draw polygons, then tag the matching vehicles | Enable the Clustering checkbox and pick an overlap option |
| Best when | Territories are known and specific vehicles must serve specific areas | You want compact, separated routes without predefining any zones |
The two features can be combined. Use **Geotagging** to enforce which vehicles are allowed in an area (via tags), and enable **Clustering** to keep the resulting routes compact and non-overlapping. See [Clustering](/pages/route-optimization/configuration/clustering) for the full configuration.
## Related Documentation
* [Clustering](/pages/route-optimization/configuration/clustering)
* [How to Use Route Optimization](/pages/route-optimization/how-to-use-route-optimization)
* [Route Optimization Configuration Introduction](/pages/route-optimization/configuration/introduction)
This documentation is built and hosted on [Mintlify](https://mintlify.com), a developer documentation platform.