> ## Documentation Index
> Fetch the complete documentation index at: https://docsy3.mile.app/llms.txt
> Use this file to discover all available pages before exploring further.
# How to Create Automation
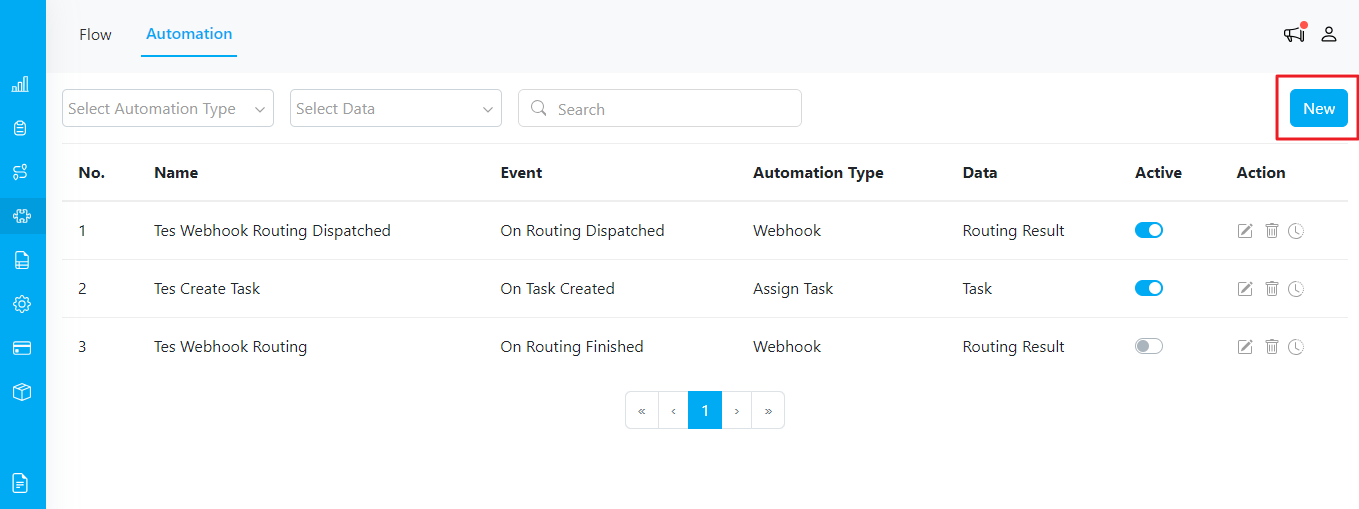
In this section, we will guide you through the process of creating an automation. To start, simply click on the "New" button on the Automation page.
Required permission:
* View Automation
* Create Automation
New Button on Automation Page
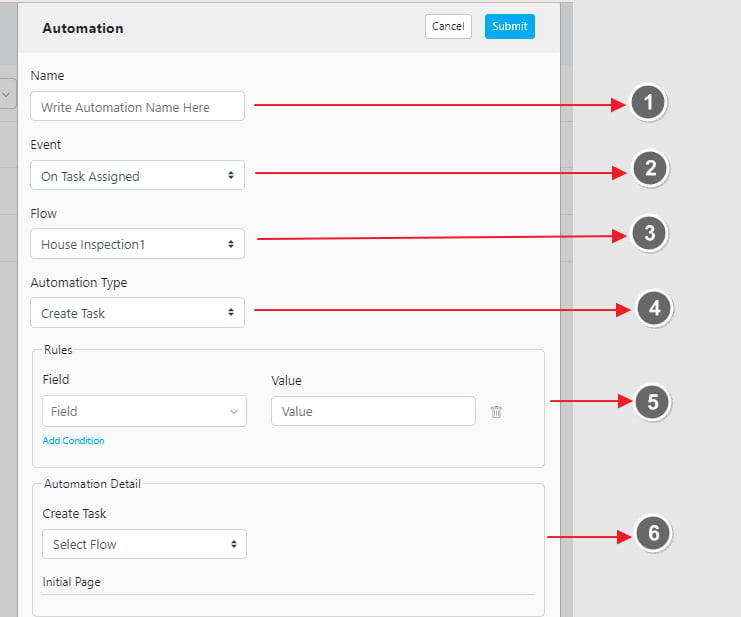
Here's the detail of the automation form:
## Automation Form Fields
1. **Name**: Provide a descriptive name for your automation. This will help you easily identify its purpose.
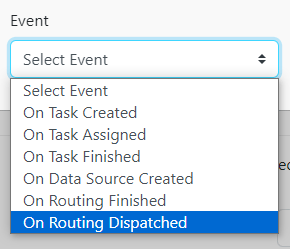
2. **Event**: The event acts as the trigger for the automation. This specifies when the automation should be activated. Events can include task creation, task updates, routing finished, etc.
3. **Flow**: Specify the task flow, such as Pickup or Delivery. This defines the type of tasks the automation will apply to.
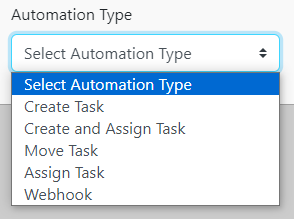
4. **Automation Type**: Determine the action that should occur when the event is triggered. The available automation types will vary based on the selected event. Examples include creating a task, updating a task, assigning a task, sending webhook etc.
5. **Rules**: Rules act as filters that define the conditions under which the automation should run. For example, if you want the automation to trigger when there is a Pickup task where the "Customer Name" is "William," you would set this rule accordingly.
* **Example**: Choose the field "Customer Name" and set the value to "William." This means the automation will run only for Pickup tasks where the customer name is William.
* **Note**: Rules can be left empty if no specific filtering is needed.
6. **Automation Details**: Define the specifics of what the automation will do based on the selected Automation Type.
* **Example**: If you choose the Automation Type "Create Task," you will need to fill in all relevant information about what the new task should look like, including task address, coordinate, assignees, etc.
This documentation is built and hosted on [Mintlify](https://mintlify.com), a developer documentation platform.