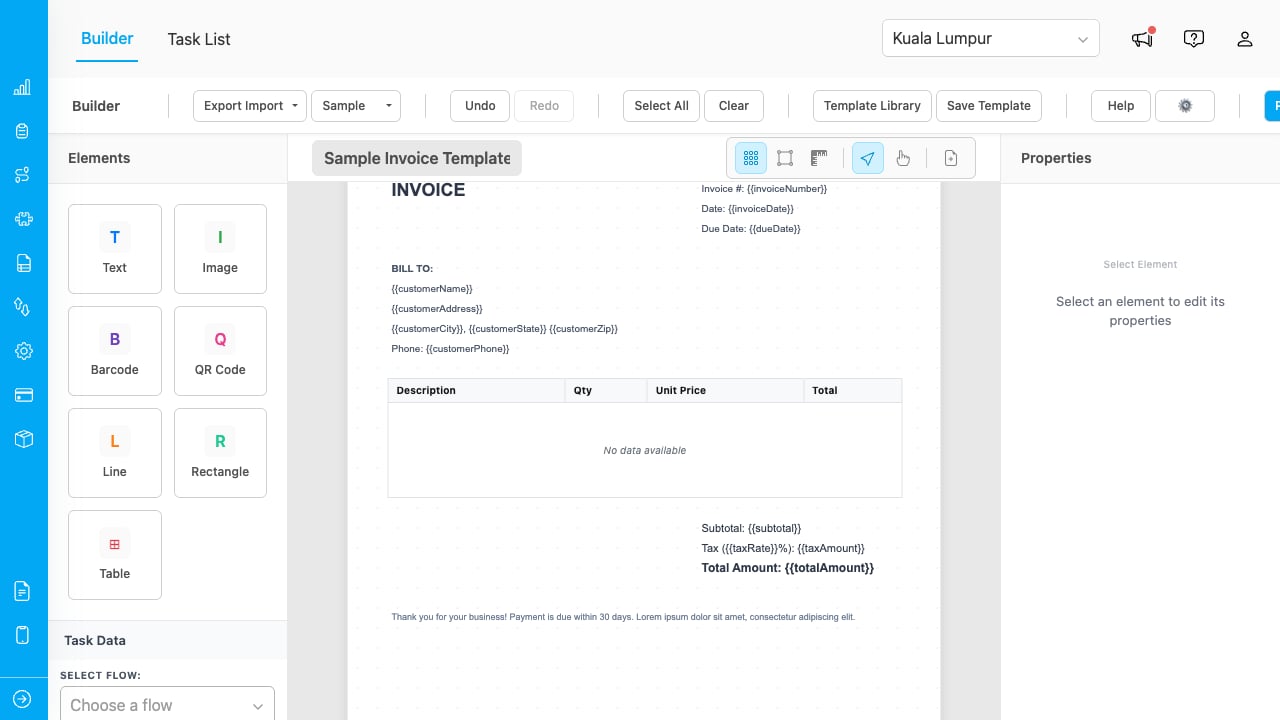
The builder canvas with a sample invoice template.
## Adding Elements Click an element type in the left sidebar to add it to the canvas. | Element | Description | | - | - | | **Text** | Static or dynamic text. Supports font size, family, weight, alignment, and color. Switch to "Data Field" mode to display task data. | | **Image** | Upload a file, enter a URL, or bind to a task data field (e.g., photos, signatures). Supports contain, cover, fill, none, and scale-down fit modes. | | **Barcode** | Renders a scannable barcode. Supports CODE128, CODE39, EAN13, EAN8, UPC, and ITF14 formats. Values auto-update to valid samples when switching formats. | | **QR Code** | Renders a QR code from static text or a data field. Supports four error correction levels (Low, Medium, Quartile, High). | | **Line** | A horizontal or vertical line. Configure stroke width, color, and style (solid, dashed, dotted). | | **Rectangle** | A filled or outlined rectangle. Configure fill color, stroke color, and stroke width. | | **Table** | A data table bound to an array field in task data. Configure columns, header background, border color, and font size. | ## Selecting and Editing Elements * Click an element to select it. The Properties panel on the right shows all editable properties. * Drag an element to reposition it. Use arrow keys for 1px nudges, or Shift+Arrow for 10px. * Drag the resize handles (8 points around the element) to resize. * Double-click a text element to open inline editing. * Ctrl+Click / Cmd+Click additional elements to multi-select. ## Data Field Binding Bind any element to live task data so it displays real values when printing: 1. Select the element and find the **Plain Value / Data Field** toggle in the Properties panel. 2. Click **Data Field** to switch modes. 3. Select a field from the dropdown. The element updates to show the resolved value from the loaded task.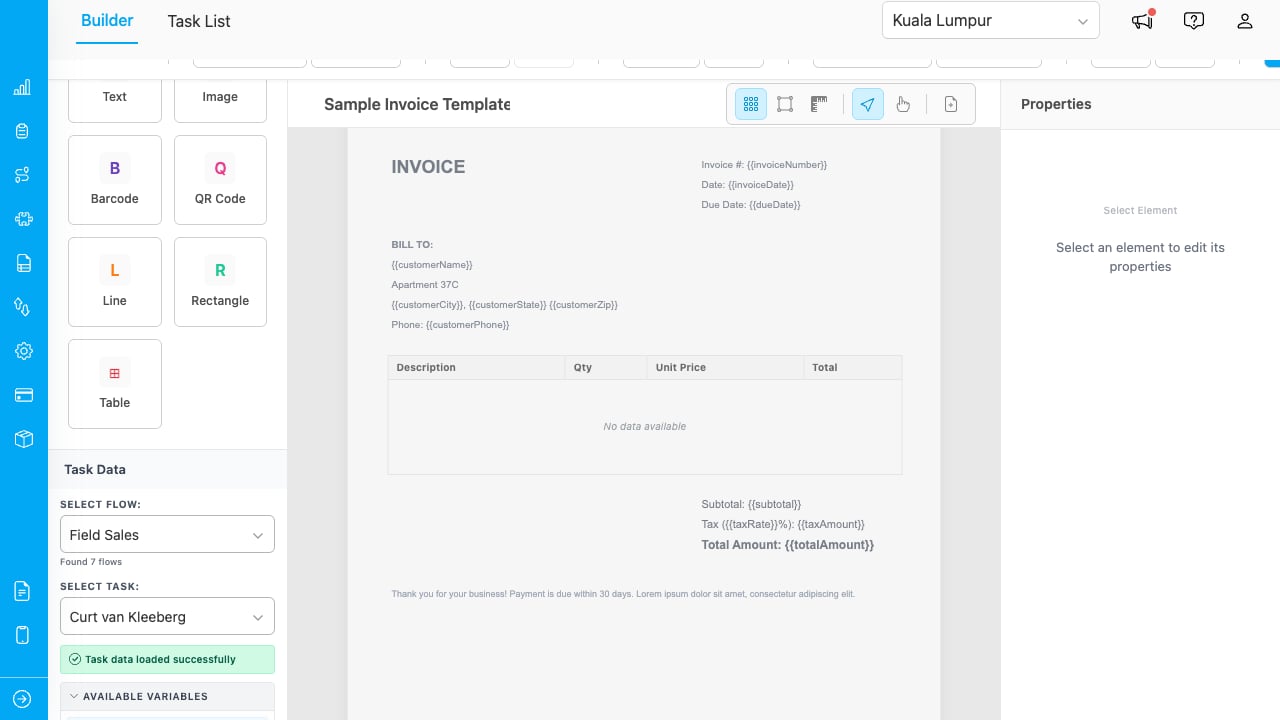
The data tree shows all available task variables with type badges.
## Multi-Page Canvas Templates can span multiple pages. Each page is a separate canvas area stacked vertically. * Click the **Add Page** button (file icon in the toolbar) to add a new page. * Each page has a **Page N** label and a trash icon to delete it. * Elements belong to the page they are placed on. Select All (Ctrl+A / Cmd+A) only selects elements on the active page. * Drag an element past the bottom edge of a page to move it to the next page.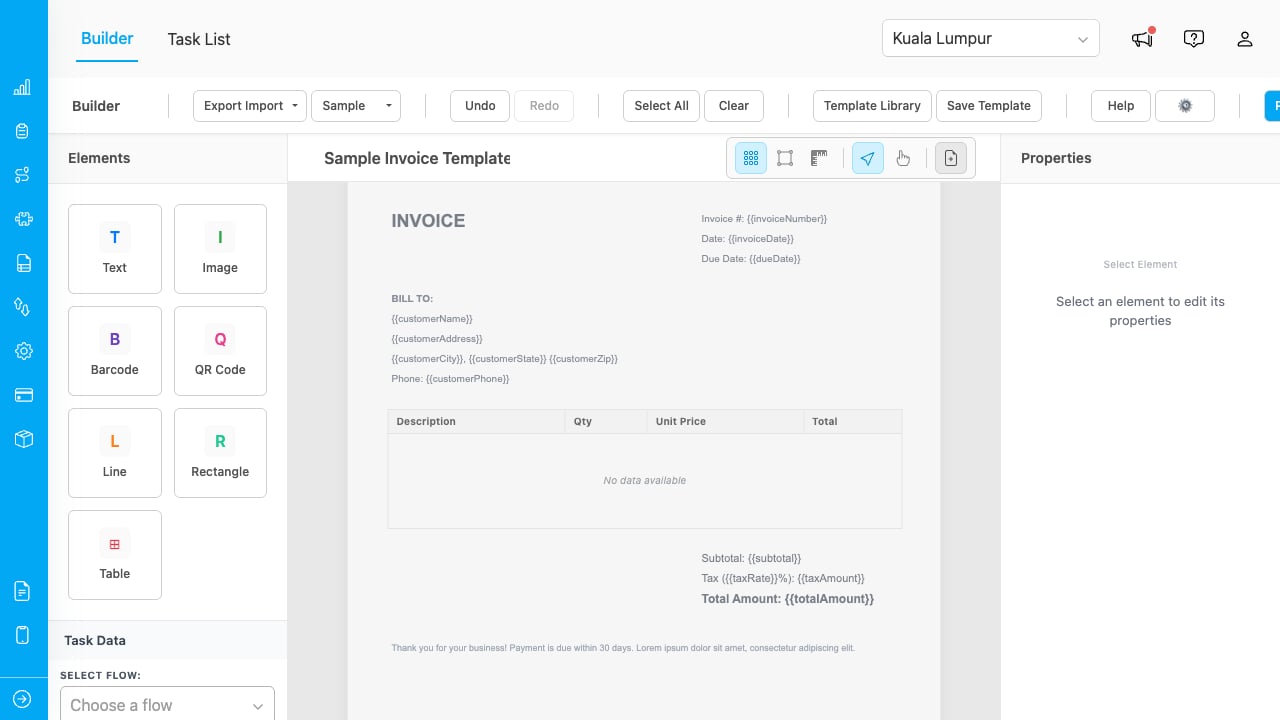
A two-page template with page labels and element counts.
## Header and Footer Zones Header and footer zones let you place elements that repeat on every page, like company logos, page numbers, or document titles. 1. Click the **gear icon** (⚙) and select **Header & Footer**. 2. Set the **Header Height** (e.g., 80px) and **Footer Height** (e.g., 50px). 3. Place elements within the zone area (above the header line or below the footer line). These elements appear on every page automatically.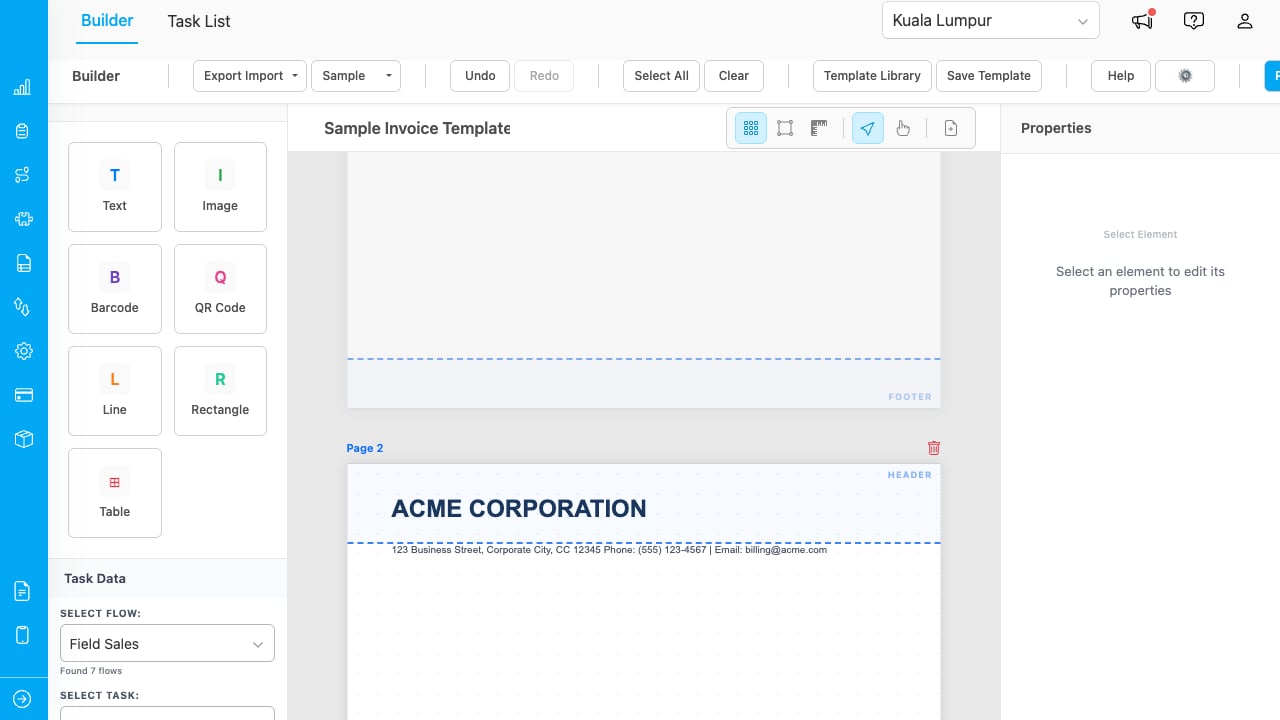
Blue dashed lines mark the header and footer zones on the canvas.
Use the variables `{{pageNumber}}` and `{{totalPages}}` in text elements placed in zones. They resolve per page in preview and PDF output (e.g., "Page 1 of 3"). ## Watermark Add a text watermark that appears behind all elements on every page. 1. Click the **gear icon** (⚙) and select **Watermark**. 2. Enable the watermark toggle. 3. Configure the text content, font size, color, opacity, and rotation.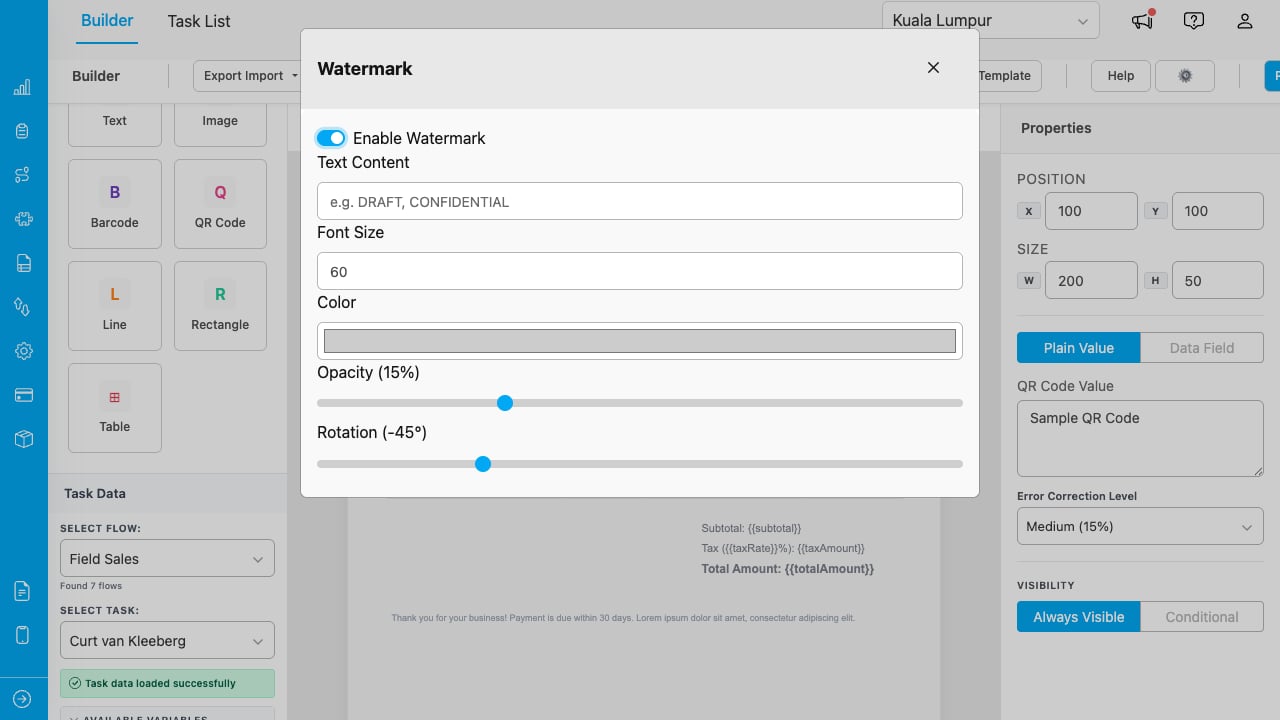
Watermark settings with text, font size, color, opacity, and rotation controls.
The watermark renders identically on the canvas, in preview, and in the exported PDF. Disable the toggle to remove it. ## Conditional Visibility Show or hide elements based on task data values. This lets a single template adapt to different scenarios without creating separate templates. 1. Select an element and scroll to the **Visibility** section in the Properties panel. 2. Click **Conditional** (instead of "Always Visible"). 3. Choose a **Data Field**, an **Operator** (Equals, Does Not Equal, Contains, Is Empty, Is Not Empty), and a **Value**.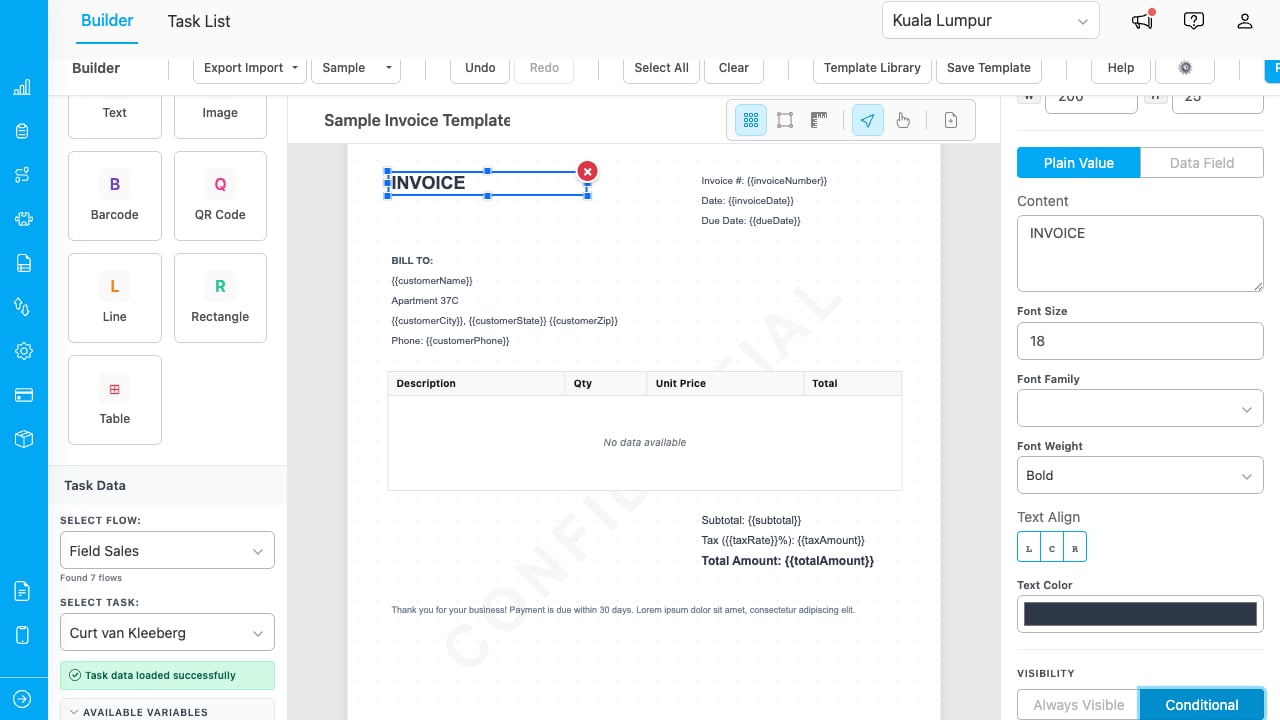
Conditional visibility with Data Field, Operator, and Value controls.
When the condition is not met, the element appears dimmed with diagonal stripes on the canvas (still selectable for editing). In preview and PDF output, the element is hidden entirely.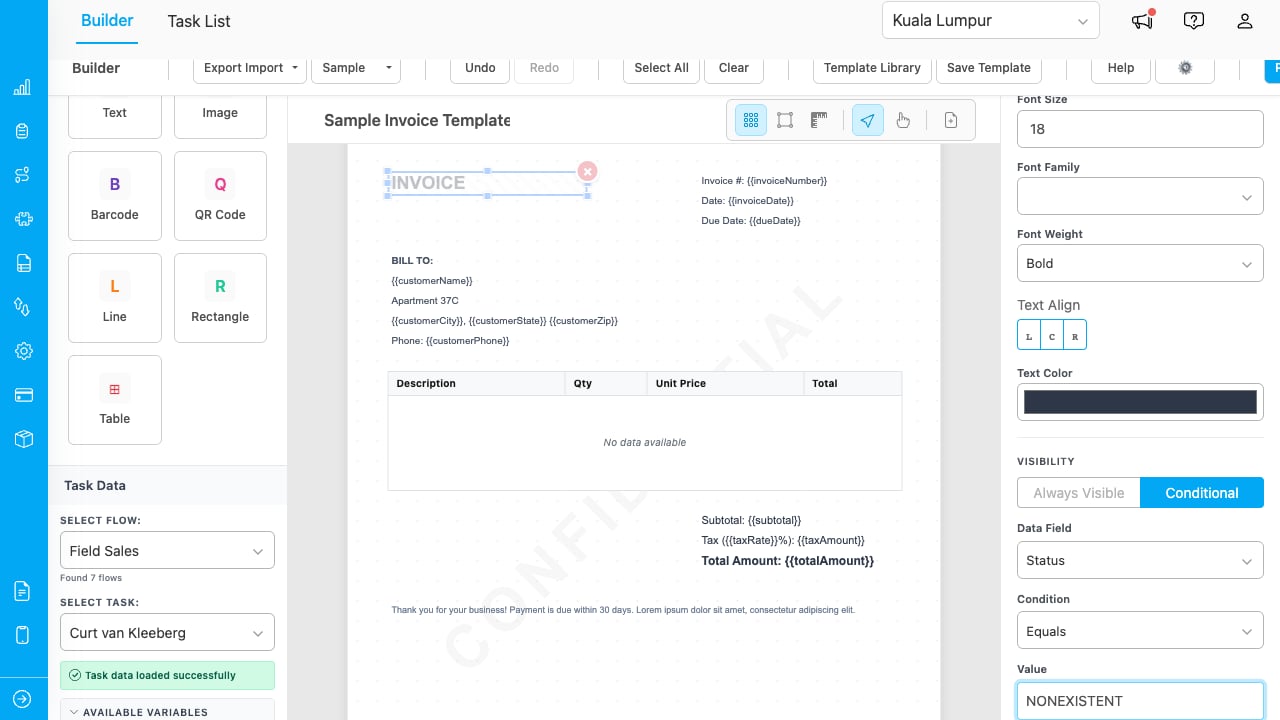
A conditionally hidden element shown dimmed on the canvas.
## Grid and Snap * Press Ctrl+G / Cmd+G to toggle grid dots on the canvas. * Press Ctrl+; to toggle snap-to-grid alignment. * Click the **rulers** button to show measurement labels on selected elements. * Use Ctrl+Shift+H to align selected elements horizontally, or Ctrl+Shift+V to align vertically. ## Keyboard Shortcuts Press **F1** or click the **Help** button to see all available shortcuts.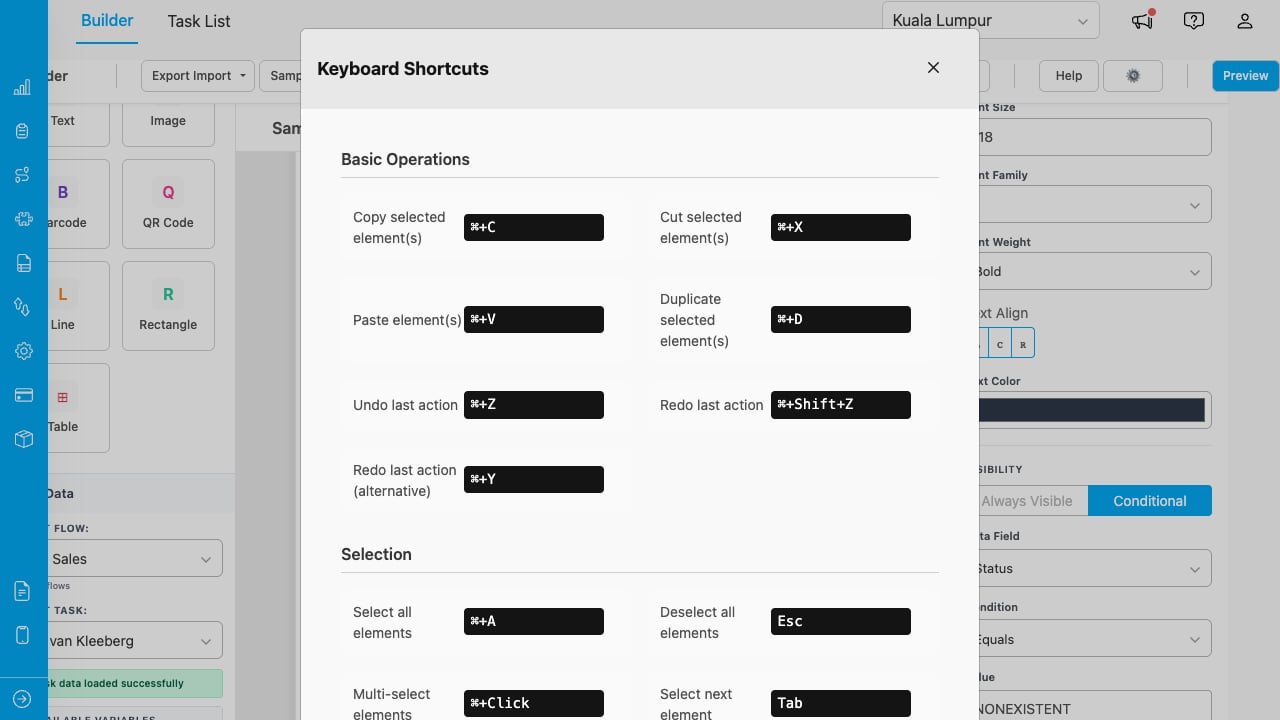
The keyboard shortcuts reference modal.
| Action | Shortcut | | - | - | | Select all (active page) | Ctrl+A / Cmd+A | | Copy | Ctrl+C / Cmd+C | | Paste | Ctrl+V / Cmd+V | | Duplicate | Ctrl+D / Cmd+D | | Undo | Ctrl+Z / Cmd+Z | | Redo | Ctrl+Y / Cmd+Y | | Delete | Delete / Backspace | | Nudge 1px | Arrow keys | | Nudge 10px | Shift+Arrow keys | | Toggle grid | Ctrl+G / Cmd+G | | Align horizontal | Ctrl+Shift+H | | Align vertical | Ctrl+Shift+V | | Help | F1 | ## Saving Templates 1. Click **Save Template** in the toolbar. 2. Enter a **Template Name** and optional **Description**. 3. Click **Save**. The template name is used as the default PDF filename when exporting. ## Template Library Click **Template Library** to browse, load, or delete saved templates.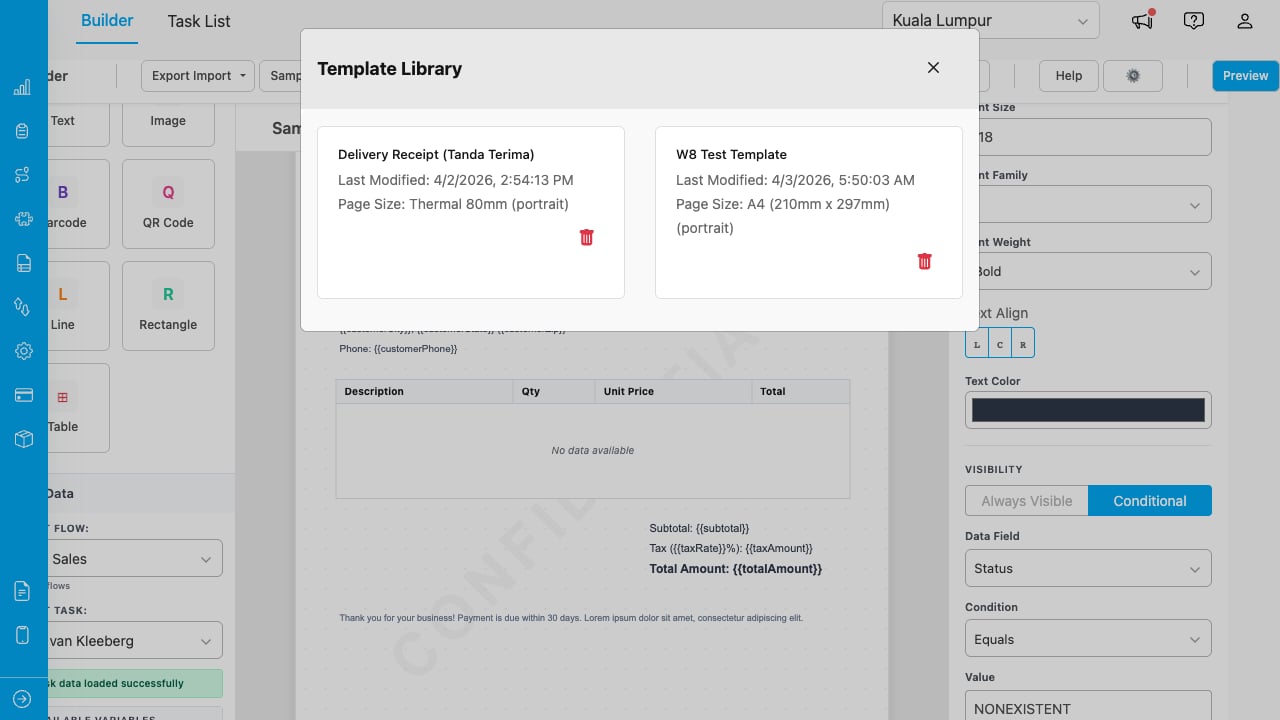
The Template Library shows saved templates as cards with name, date, and page size.
* Click a template card to load it. All elements, page count, watermark settings, and header/footer zones are restored. * Click the trash icon on a card to delete that template. * Each card shows the last modified date and page size. ## Import and Export * **Export as JSON**: Click **Export Import > Export as JSON** to download the current template as a `.json` file. This includes all elements, positions, page count, watermark, header/footer heights, and custom page sizes. * **Import from JSON**: Click **Export Import > Import from JSON** to load a previously exported template file. ## Sample Templates Click **Sample** to load a pre-built template: * **Sample Template Invoice** — A full invoice with header, bill-to section, item table, and footer (16 elements). * **Sample Template Delivery Receipt** — A delivery receipt layout. * **Sample Template Thermal Receipt (80mm)** — A narrow receipt designed for 80mm thermal printers. ## Print Settings Click **Print Settings** to configure the page size and orientation before printing or exporting. * **Page Size**: Choose from A4, A5, A6, B5, Letter, Legal, Thermal 58mm, Thermal 80mm, or create a custom size. * **Orientation**: Portrait or Landscape.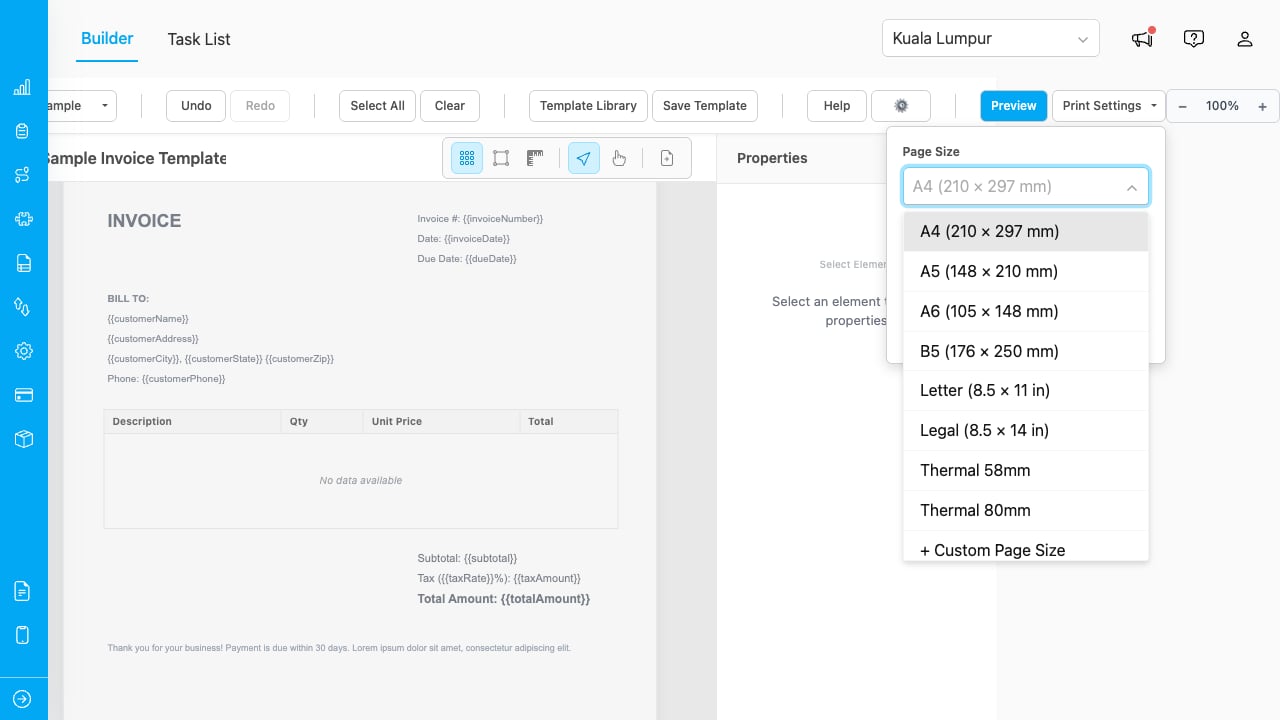
Page size dropdown with all built-in sizes and custom page size option.
Custom page sizes can be created, edited, and deleted. They appear in the dropdown alongside built-in sizes. This documentation is built and hosted on [Mintlify](https://mintlify.com), a developer documentation platform.