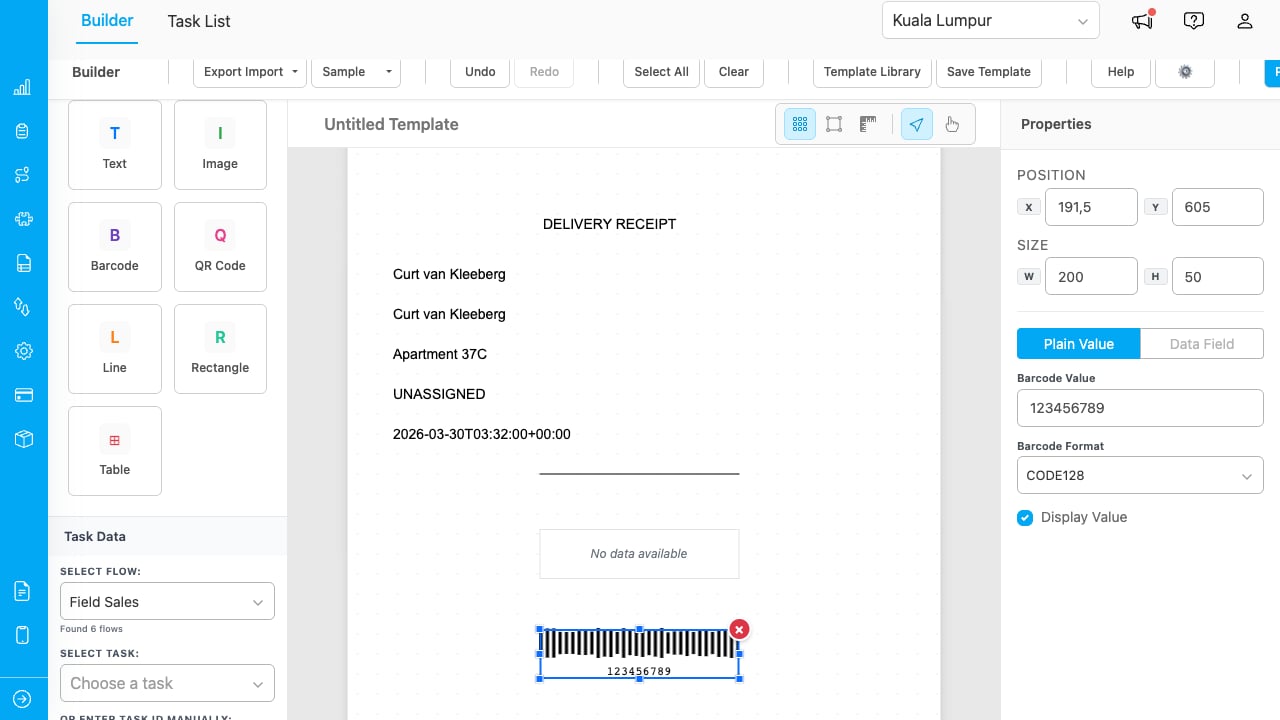
The Builder with a delivery receipt template. Left sidebar shows element types and task data. Right panel shows properties for the selected element.
## Adding Elements Drag any element type from the left sidebar onto the canvas: | Element | Description | | - | - | | **Text** | Static or data-bound text. Supports font size, family, weight, color, and alignment. | | **Image** | Static image (upload or URL) or data-bound image from task photos. | | **Barcode** | Generates a barcode from a static value or task field. Supports CODE128 format. | | **QR Code** | Generates a QR code from a value or URL. | | **Line** | A horizontal or vertical line for separators. | | **Rectangle** | A bordered rectangle for framing content. | | **Table** | A data table that can display bill items from task data. | ## Selecting and Editing Elements * **Click** an element to select it. Blue handles appear for resizing. * **Cmd+Click** (Mac) or **Ctrl+Click** (Windows) to multi-select elements. * **Arrow keys** move selected elements by 1px. **Shift+Arrow** moves by 10px. * **Tab** cycles through elements. **Shift+Tab** goes in reverse. * **Delete** removes the selected element(s). ## Data Field Binding To display real task data in your template: 1. Select a text element. 2. In the Properties panel, click **Data Field** (instead of Plain Value). 3. Choose a field from the dropdown (e.g., Customer Name, Status, Start Time). 4. The element immediately resolves to the actual value from the loaded task.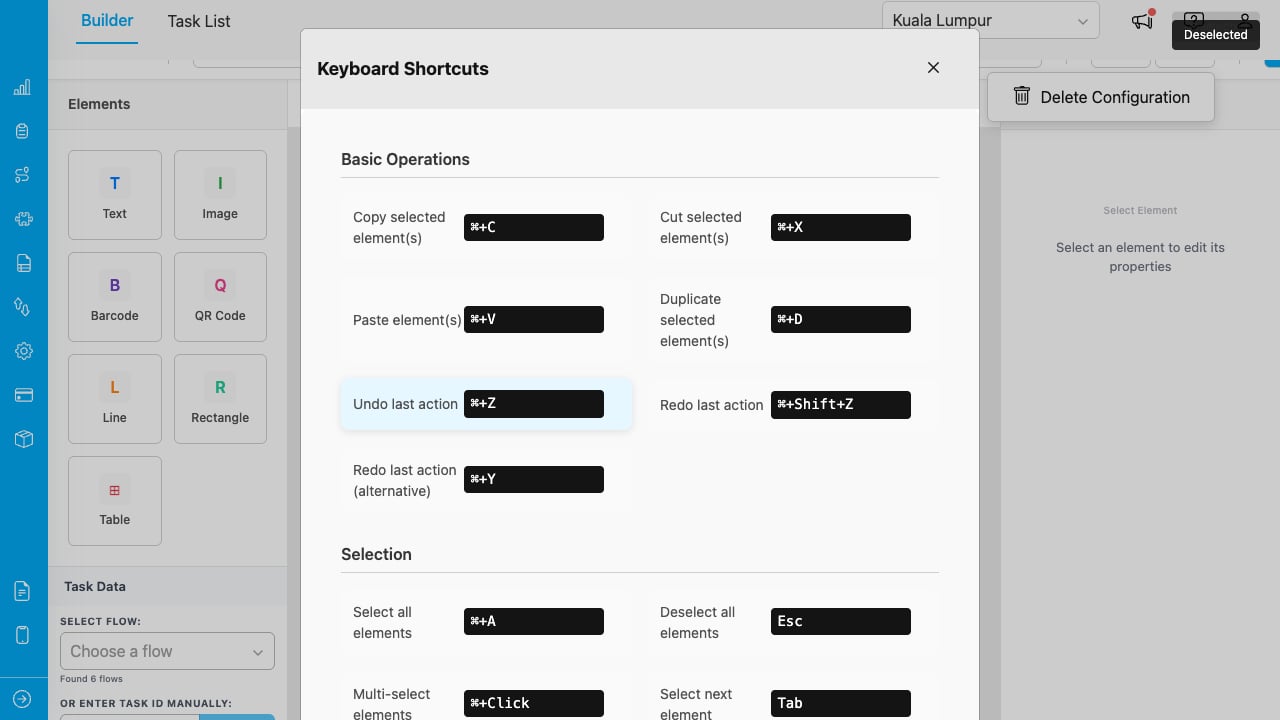
The Help modal lists all keyboard shortcuts organized by category.
Key shortcuts: | Action | Shortcut | | - | - | | Copy | Ctrl+C / Cmd+C | | Paste | Ctrl+V / Cmd+V | | Duplicate | Ctrl+D / Cmd+D | | Undo | Ctrl+Z / Cmd+Z | | Redo | Ctrl+Shift+Z / Cmd+Shift+Z | | Select All | Ctrl+A / Cmd+A | | Delete | Delete / Backspace | | Toggle Grid | Ctrl+G | | Toggle Snap | Ctrl+; | | Horizontal Align | Ctrl+Shift+H | | Vertical Align | Ctrl+Shift+V | | Preview | Ctrl+P | | Help | F1 | ## Saving Templates 1. Click **Save Template** in the toolbar. 2. Enter a name and optional description. 3. Click **Save**. If you modify a saved template, the save dialog offers both **Save** (overwrite) and **Save as New** (create a copy). ## Template Library Click **Template Library** in the toolbar to see all saved templates.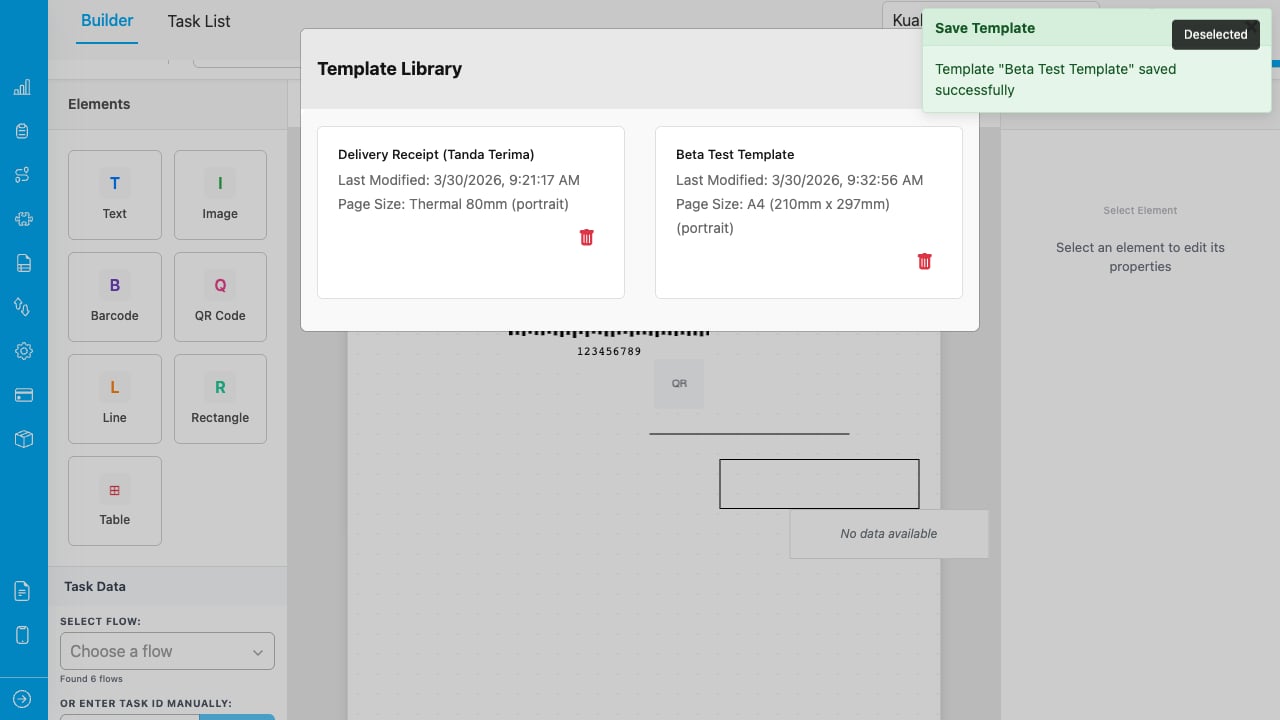
The Template Library shows cards with name, description, last modified date, and page size. Click a card to load the template.
* Click a card to load that template onto the canvas. * Click the trash icon to delete a template (with confirmation). * Templates show the last modified date and page size/orientation. ## Import and Export Use the **Export Import** dropdown in the toolbar: * **Export as JSON**: Downloads the current template as a JSON file for backup or sharing. * **Import from JSON**: Loads a template from a previously exported JSON file. ## Sample Templates Click **Sample** in the toolbar to load a pre-built template: * **Sample Template Invoice**: A standard invoice layout. * **Sample Template Delivery**: A delivery receipt with customer details and bill items. * **Sample Template Thermal**: A narrow thermal receipt (80mm width). ## Print Settings Click **Print Settings** in the toolbar to configure: * **Page Size**: A4, Letter, or custom dimensions (in mm). * **Orientation**: Portrait or Landscape.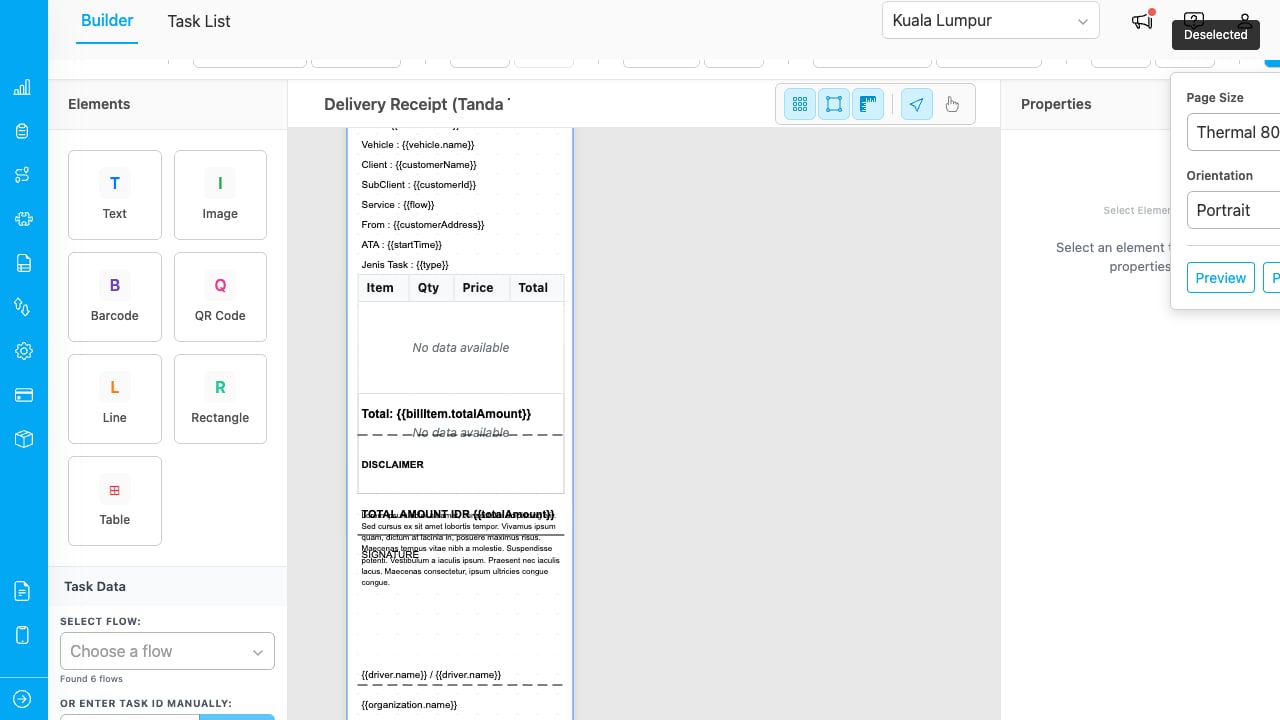
The Print Settings dropdown with page size selector, orientation toggle, and quick action buttons.
This documentation is built and hosted on [Mintlify](https://mintlify.com), a developer documentation platform.